Call Us Now!
203-775-7900
Share this Post
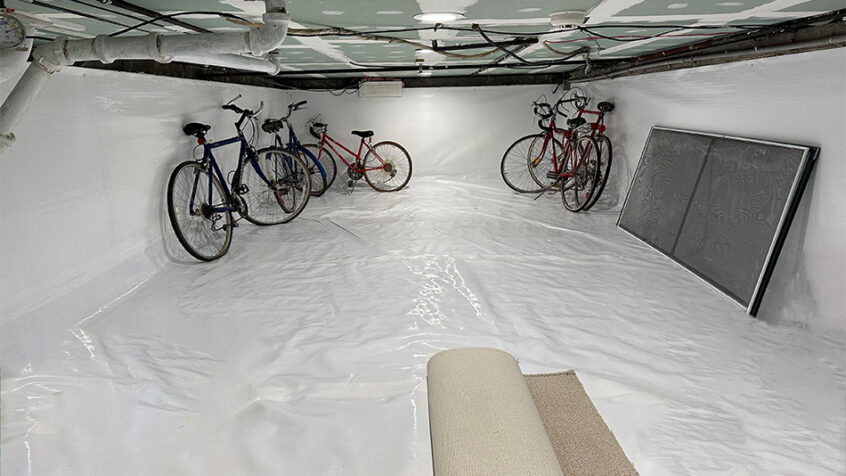
Crawl space encapsulation is a process of completely enclosing the crawl space of a home with a vapor barrier to prevent moisture and outside air from entering the space.
This process can improve the home’s air quality and energy efficiency and help prevent mold and mildew growth. However, many homeowners may wonder if the encapsulation cost is worth it.
This article will examine the costs associated with crawl space encapsulation and weigh them against the advantages and disadvantages to help homeowners determine if it is worthwhile. We will also explore other options for addressing crawl space issues, such as crawl space sealing, and discuss when encapsulation may be the best choice.
By the end of this article, homeowners should have a better understanding of the costs, benefits of crawl space encapsulation, and other alternative options and be able to make an informed decision about whether or not to proceed with this type of home improvement.
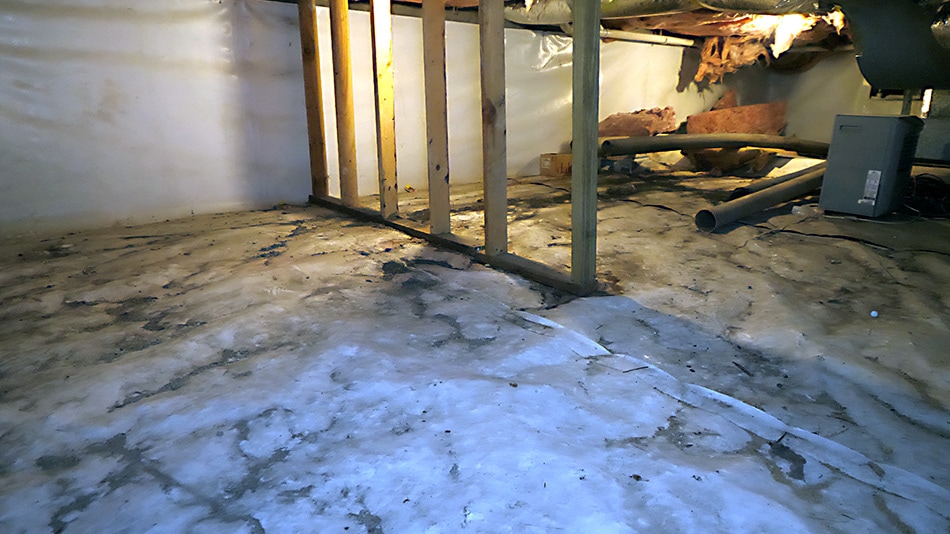
A crawl space is a small, unfinished area located beneath the first floor of a home. It is often used to access plumbing, electrical, HVAC systems, and storage. Crawl spaces are typically found in homes with a raised foundation, such as a raised ranch or split-level home.
They can be accessed through a small opening, such as a trapdoor or crawlspace access panel, and are typically less than four feet in height. Crawl spaces are typically not insulated, leading to various problems, including poor air quality, increased energy costs, and mold and mildew growth.
Additionally, crawl spaces can be prone to water damage and pests such as termites, rodents, and even snakes. Proper maintenance and repair of a crawl space are essential to ensure that it remains a safe and healthy living space. Crawl space encapsulation and sealing are two common ways to improve the conditions of a crawl space.
Crawl space encapsulation and crawl space sealing are two different methods of improving the condition of a crawl space. Crawl space encapsulation involves completely enclosing the crawl space with a vapor barrier made of thick plastic sheeting to prevent moisture and outside air from entering the space.
On the other hand, crawl space sealing involves sealing any openings or gaps in the crawl space to prevent moisture and outside air from entering the space. Both methods can improve the home’s air quality and energy efficiency and help prevent mold and mildew growth in the crawl space.
Encapsulation is more extensive and complete than sealing, and it is often recommended for homes with high moisture levels.
Crawl space encapsulation is a multi-step process that involves sealing the crawl space from the outside elements to improve the home’s air quality and energy efficiency and help prevent mold and mildew growth. Here is a step-by-step explanation of the encapsulation process:
It’s important to note that a professional contractor should be consulted to ensure the process is done correctly. The process may take a few days to a week, depending on the size and condition of the crawl space.
The cost and time for crawl space encapsulation can vary depending on several factors, such as the size and condition of the crawl space, the materials used, and the location. A crawl space encapsulation project can cost anywhere from $5,000 to $16,000.
However, it can be more expensive for larger or more complex spaces or for those that require additional work, such as mold remediation. The cost can also vary depending on the materials used and the type of insulation that is installed.
As for the time, it can take a few days to a week for a professional contractor to complete an encapsulation project, depending on the size and condition of the crawl space. The process may also take longer if additional work, such as mold remediation, is required. After inspecting and evaluating the crawl space, the contractor can determine the exact time frame.
It’s important to note that the cost and time can vary depending on the location and the contractor you choose. Getting multiple quotes from different contractors before making a decision is recommended.
Crawl space encapsulation offers several advantages for homeowners. Some of the main advantages include:
It’s important to note that encapsulation is not a one-time solution. Regular maintenance and inspection should be done to ensure that the encapsulation is effective and to address any issues that may arise in the future.
Crawl space encapsulation can have some disadvantages, depending on the specific situation. Here are a few potential downsides to consider:
It is essential to consider these potential downsides and weigh them against the benefits of encapsulation before making a decision. It is also essential to consult with a professional contractor to ensure that the encapsulation is done correctly and to address any potential issues.
A crawl space waterproofing project can include installing a drainage system with sump pumps. This can be an essential addition in homes prone to water infiltration or flooding in the crawl space. A drainage system with sump pumps can help remove any water that may enter the crawl space, which can help prevent mold, mildew growth, and structural damage.
The SuperDry System is a basement drainage system that includes a perforated pipe installed around the perimeter of the crawl space and a sump pump installed in the lowest part of the crawl space alongside the foundation’s footer. The perforated pipe collects water that may enter the crawl space and channel it to the sump pump. The sump pump then pumps the water out of the crawl space and away from the house.
The Supercrete Method is a perfect way to waterproof any crawl space by using a combination of stone, a vapor barrier, and our proprietary Supercrete mix to seal a crawl space from moisture. This approach can provide multiple layers of protection, ensuring the crawl space remains dry and free from water infiltration. Supercrete is the same mixture we use to reconstruct floors and mend walls. It is more robust than concrete, non-porous, and waterproof.
Using stone as supporting drainage to the SuperDry System around the entire crawl space can help direct water to the drainage pipes.
A vapor barrier, typically made of thick polyurethane plastic, is used to prevent moisture from passing through the added stone and seal the crawl space floor to create a barrier between the subfloor and the Supercrete floor.
Supercrete as a flooring material in the crawl space can also help prevent water from seeping into the crawl space, especially when it’s sloped, and have a drainage system to direct water out of the crawl space.
It’s important to note that adding a drainage system with sump pumps can increase the cost of the crawl space waterproofing project, and it’s recommended to consult with a professional contractor to determine if it’s necessary for your specific situation and to get an accurate cost estimate.
Additionally, it’s essential to check the sump pumps to ensure they are working correctly and to avoid any potential water damage.
Do you have a wet crawl space and need help? Set up an appointment for a free inspection and quote.